How to Play Mottle
Look at the light before you look at the Firefly. In Mottle — Hide & Seek, a short drag can earn points, but letting go in time is what gives the chameleon a chance to blend. This guide follows a run from the opening countdown to the last life and explains what to practice for a higher score.
Last updated
Your first round, step by step
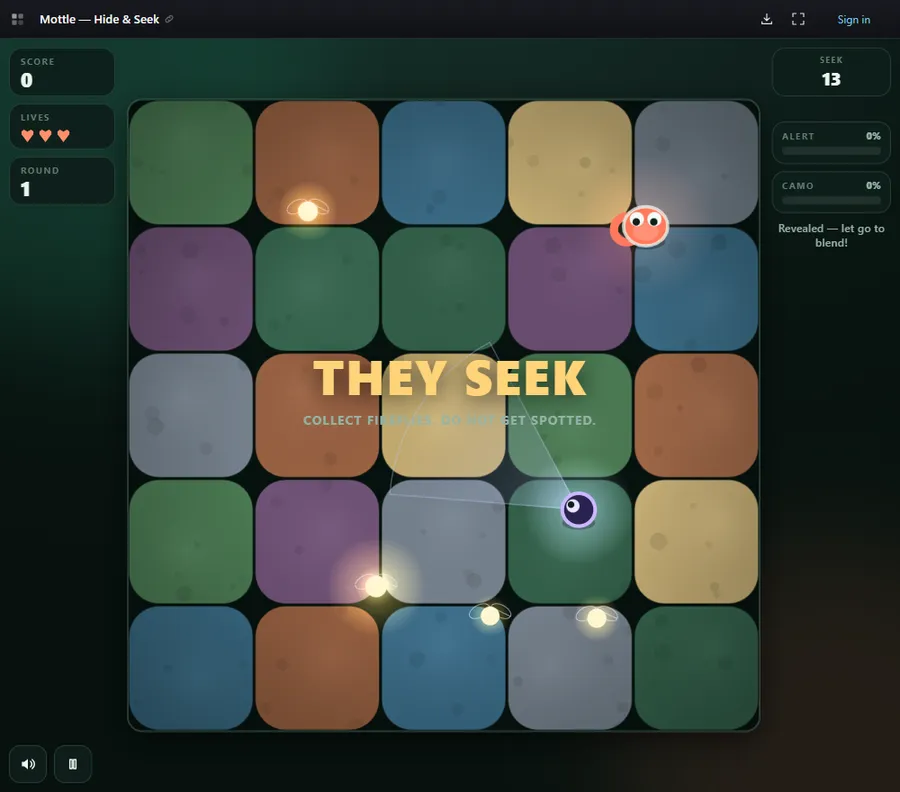
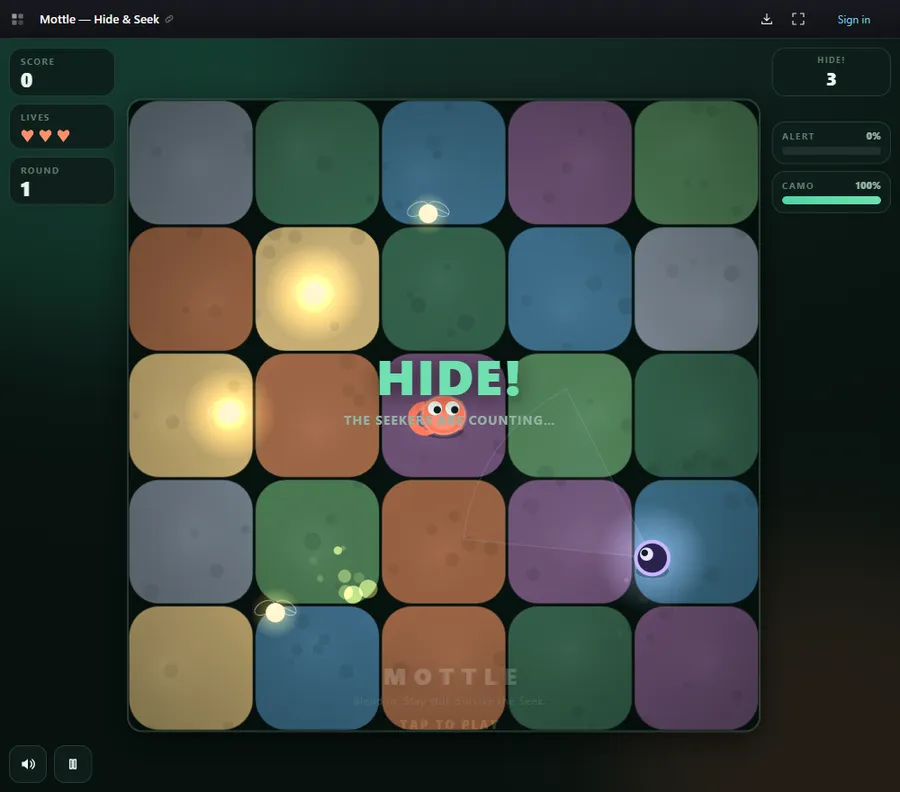
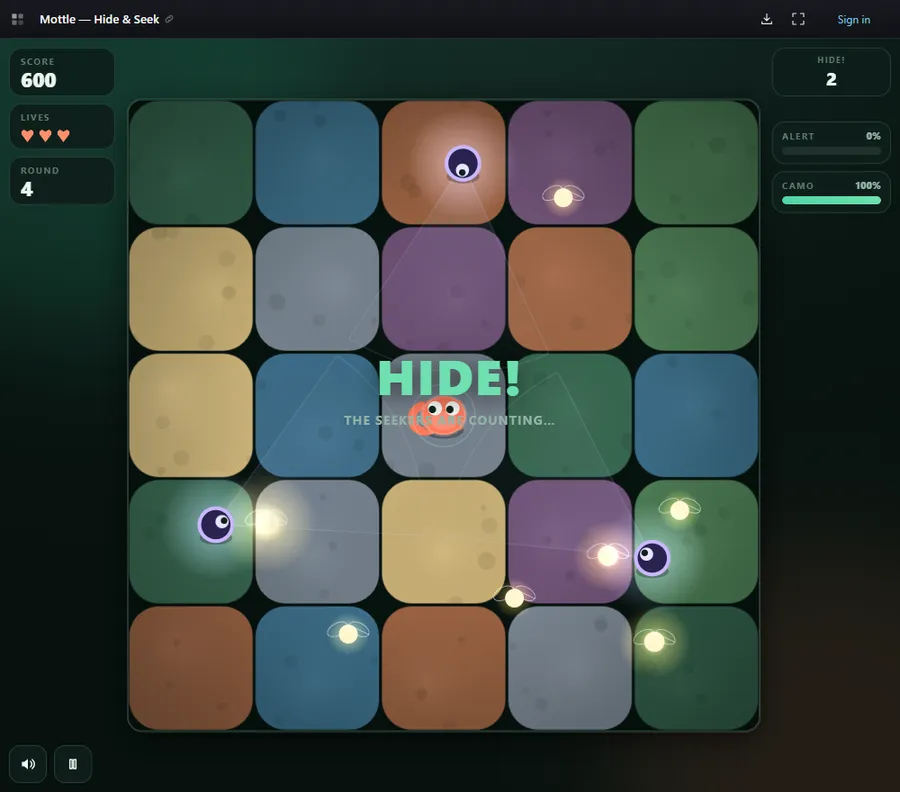
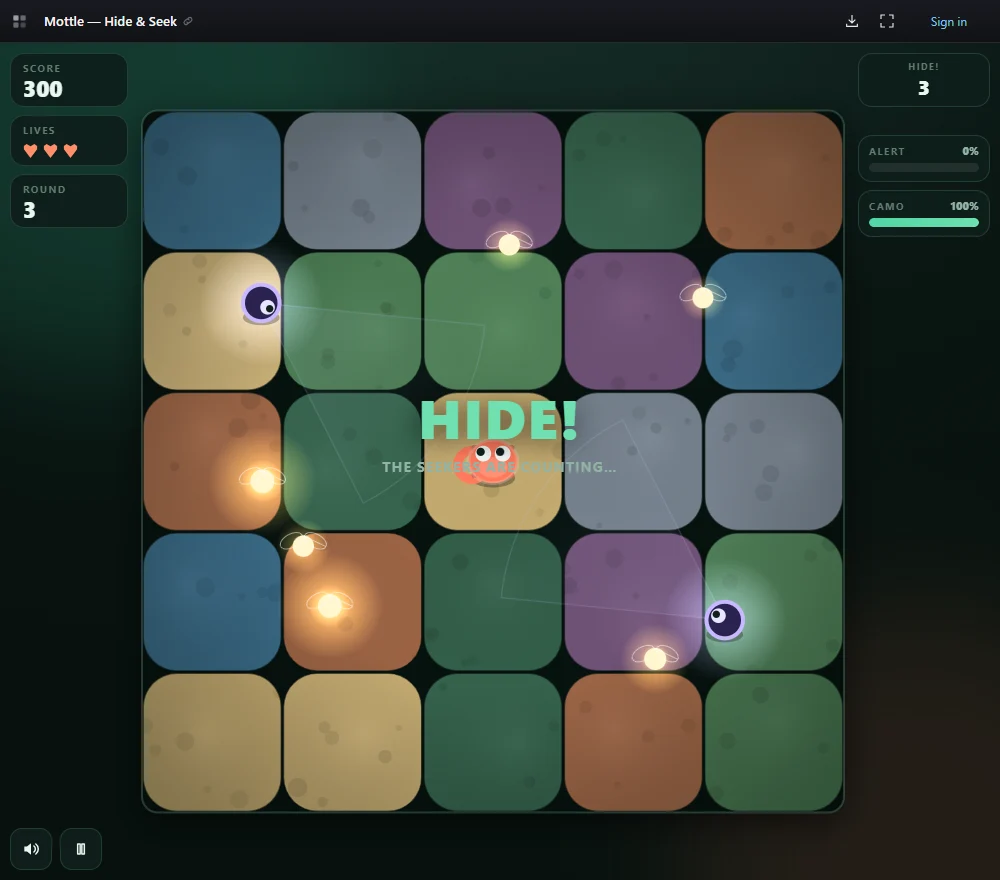
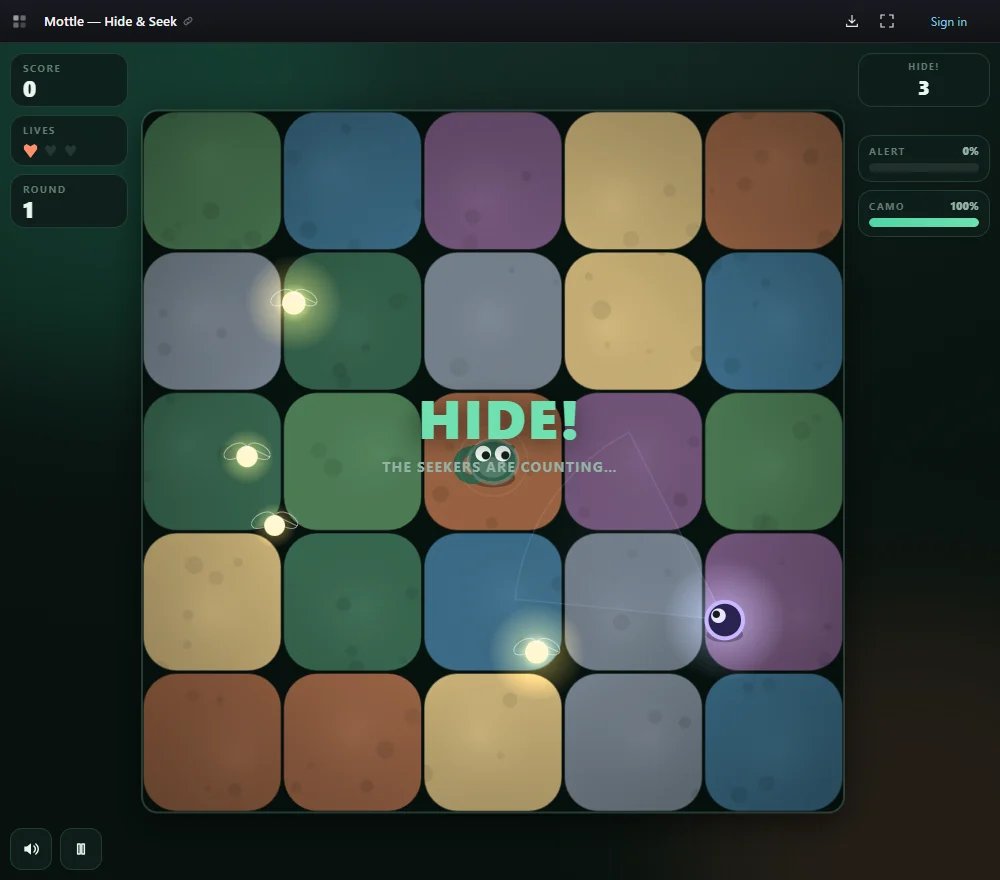
Select Play on the homepage and start a run in the game. When HIDE! appears, look for the chameleon, a nearby Firefly and the closest Seeker. Score, Lives and Round are on the left in the desktop layout. The Hide countdown, Alert and Camo are on the right. In our opening test, an attempted drag during Hide did not shift the character. Use this time to read the board.
- Locate the character. Look for the small chameleon on the color field. Before dragging, choose one nearby glow and a patch where you can stop after you collect it.
- Try the controls in a short burst. Hold the mouse button and drag inside the field. Let go after moving a little. Watch the body color settle and check whether Camo climbs. On a phone, use the same drag-and-release gesture with one finger.
- Cross after a sweep. Watch the edge of the nearest cone move past your path. If you have room to cross, drag through the Firefly, finish on the planned patch and let go.
- Confirm the pickup. Look at Score just after you pass through the glow. If the light is coming back, stay with the move you planned instead of turning toward a second pickup.
- Check Alert after you stop. Read both meters. A growing Camo bar tells you the blend is improving. A rising Alert bar tells you exposure still matters at this spot.
- Reassess at the next countdown. Scan the new placement and the current beam directions. Choose another short route before committing to a longer one.
What we saw in the browser
We tested Star Lord’s original game on November 15, 2026 in desktop Chromium with a mouse. We ran separate movement and survival attempts and recorded the visible scores, hearts, round labels and meters. The screenshots are from the game, with file sizes reduced for the guide.
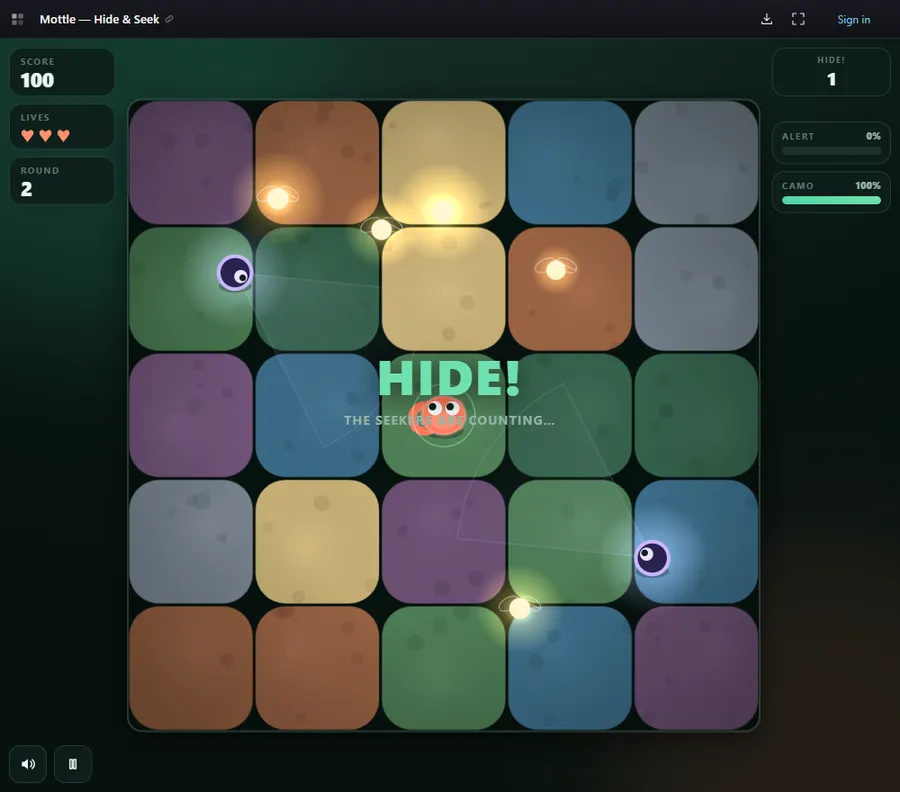
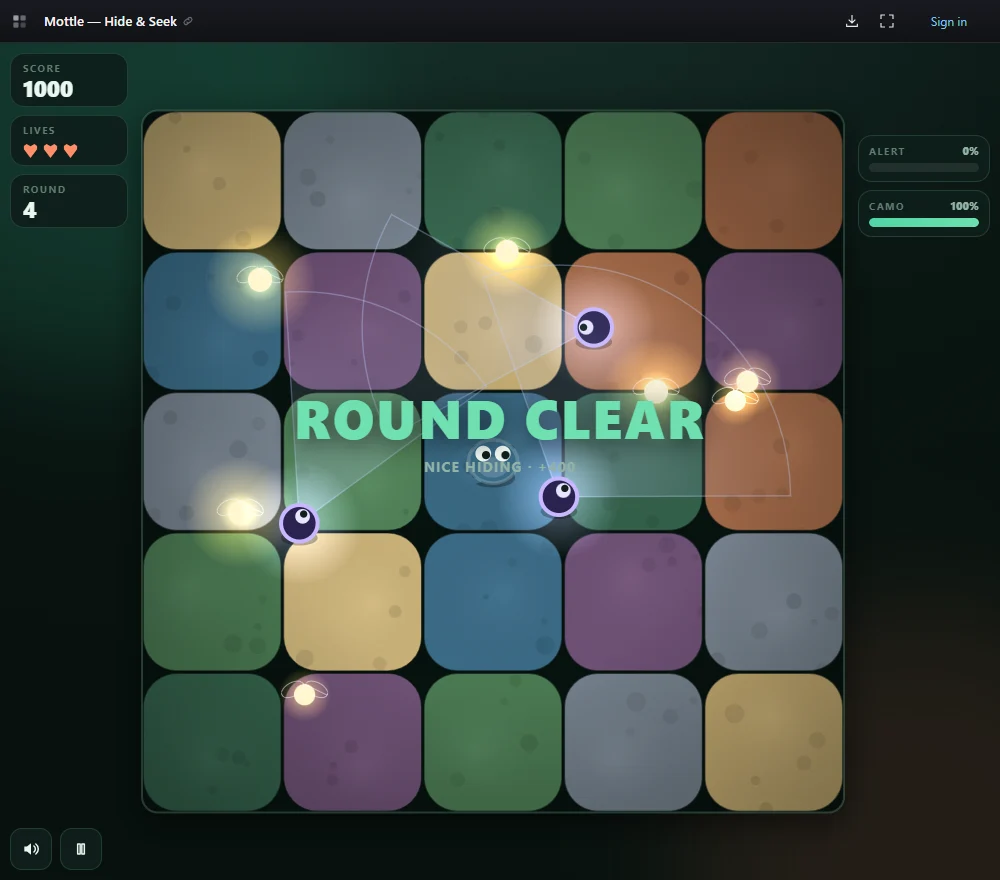
For our baseline run, we let the chameleon stand still. The first Hide screen showed three lives, Score 0, Camo 100% and Alert 0%. The game advanced to Round 2 with all three hearts and Score 100, without an intentional Firefly pickup. By the Round 4 opening, the score was 600 and all three hearts remained. Surviving those rounds earned points in this run.
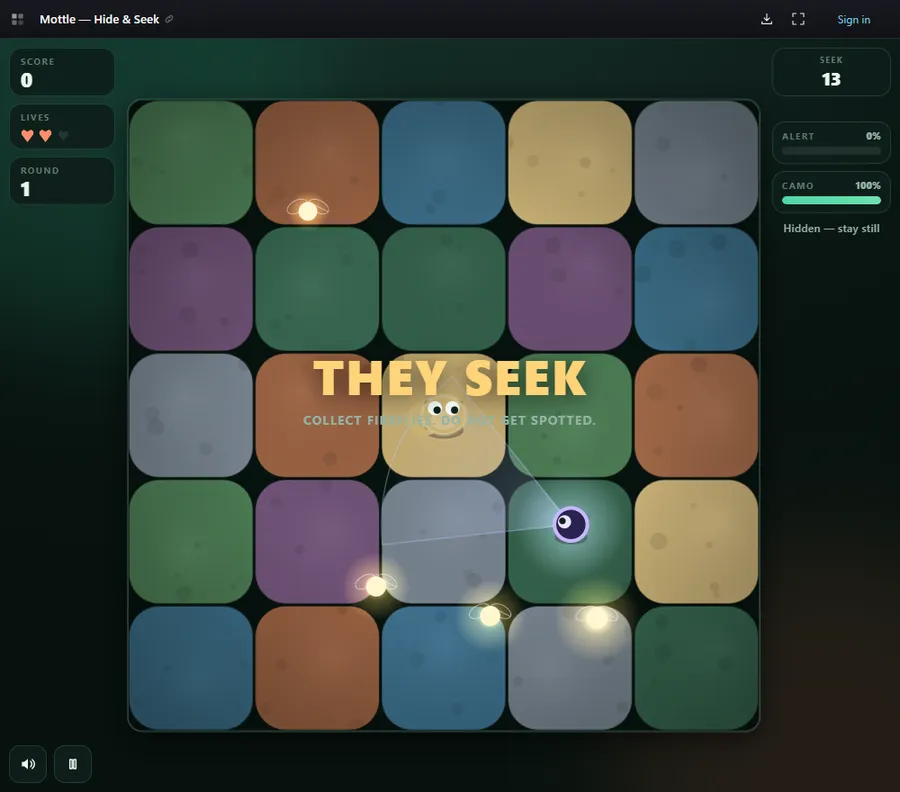
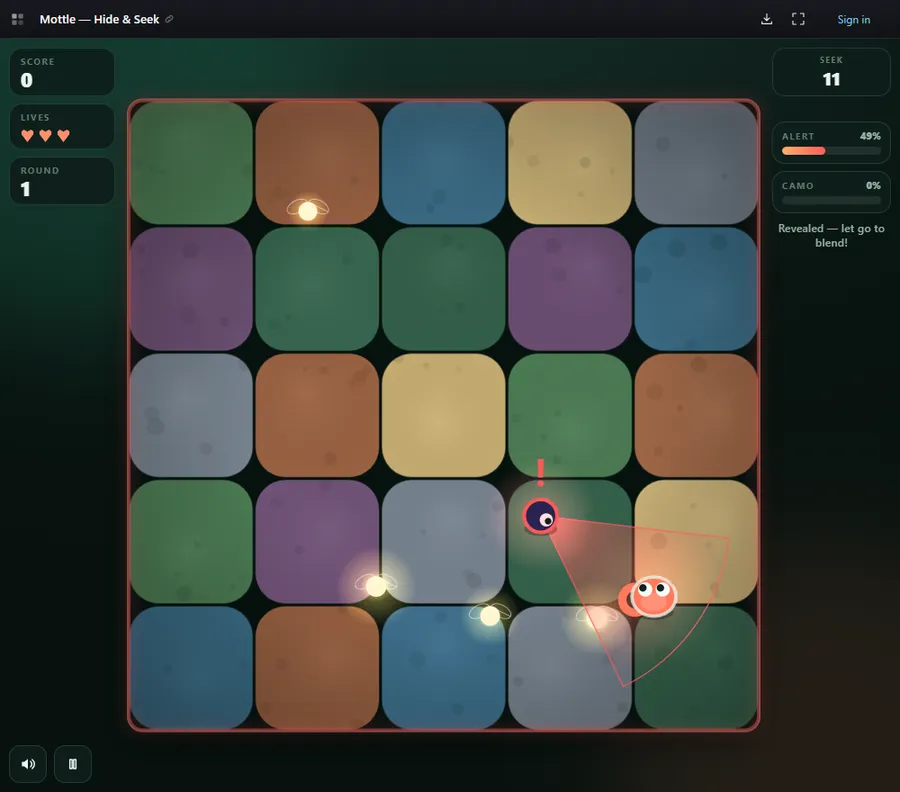
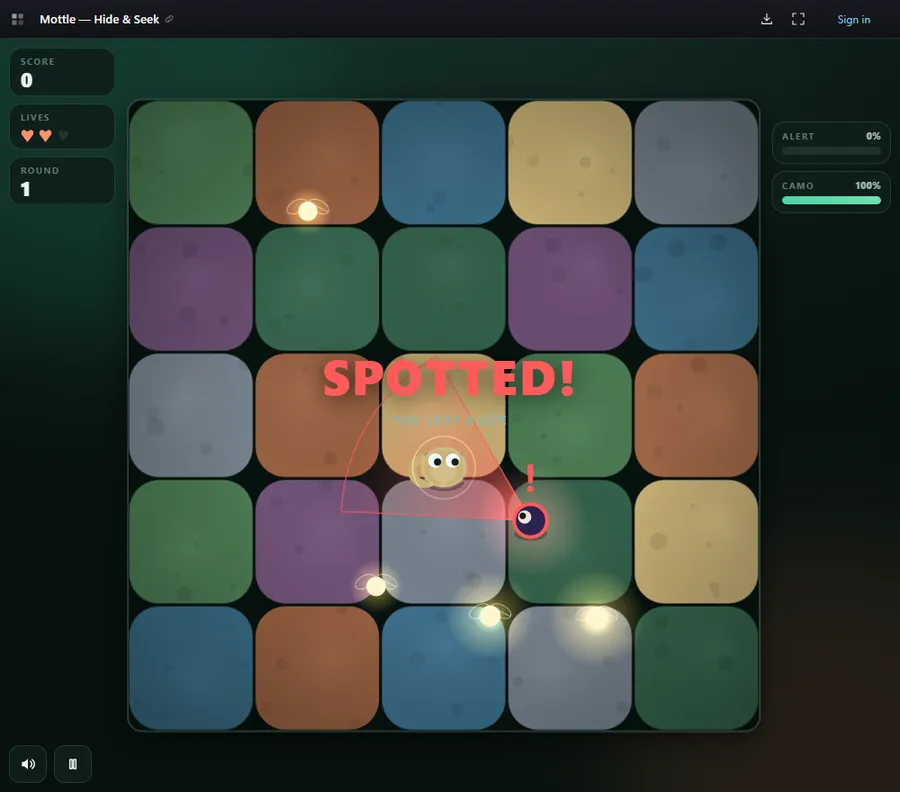
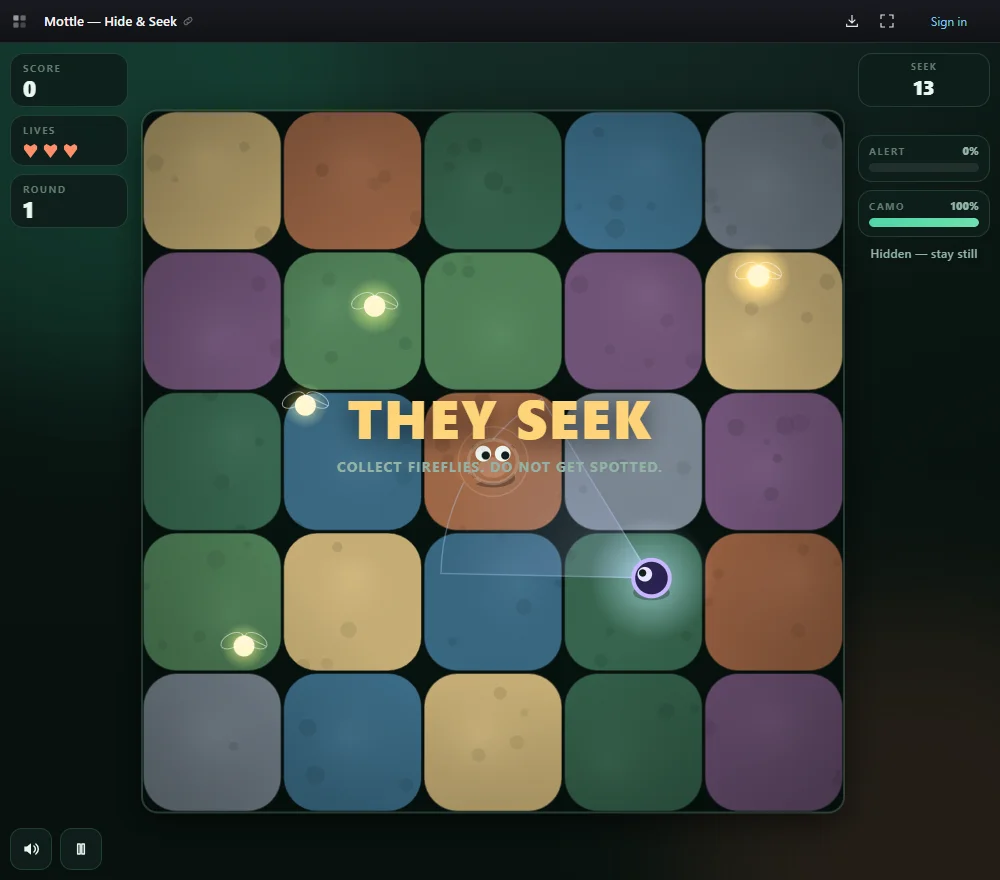
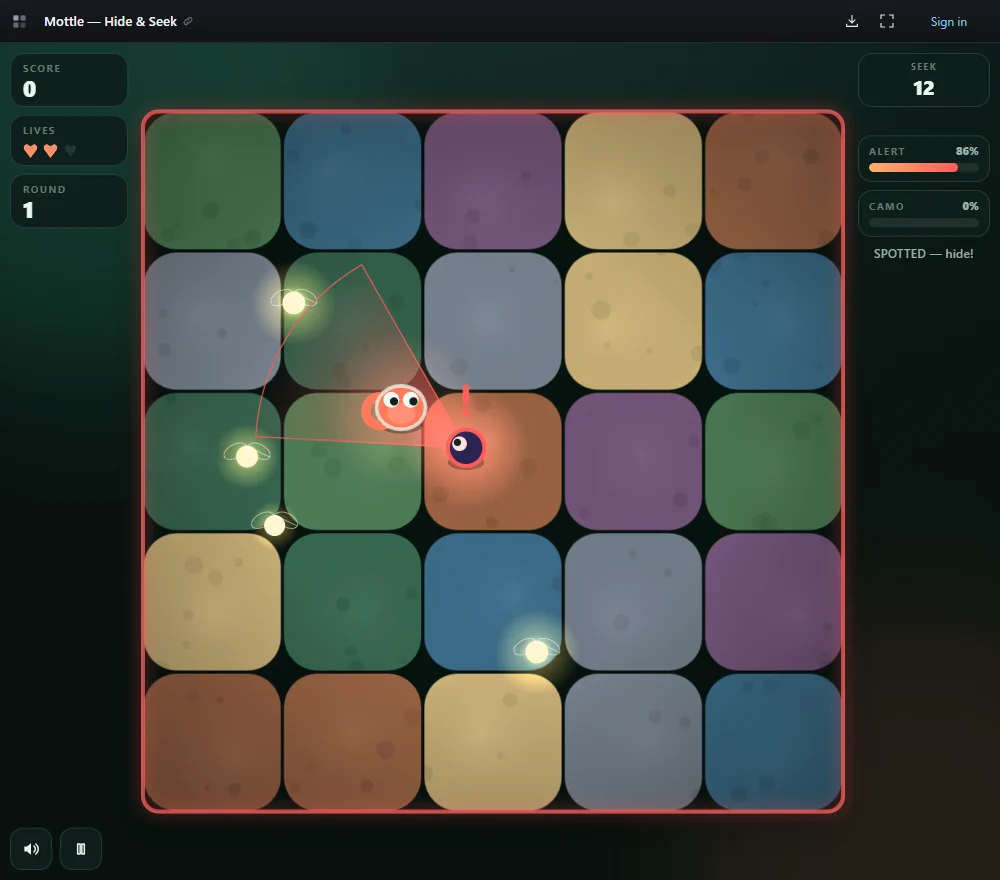
In a separate exposure test, moving during Seek brought Camo to 0%. We saw Alert about halfway up the bar, then at 100% with “SPOTTED — hide!” The catch removed a heart. The game restarted the Hide phase in the same round, with Alert 0% and Camo 100%. The first active Seek countdown showed 13 seconds on one captured frame.
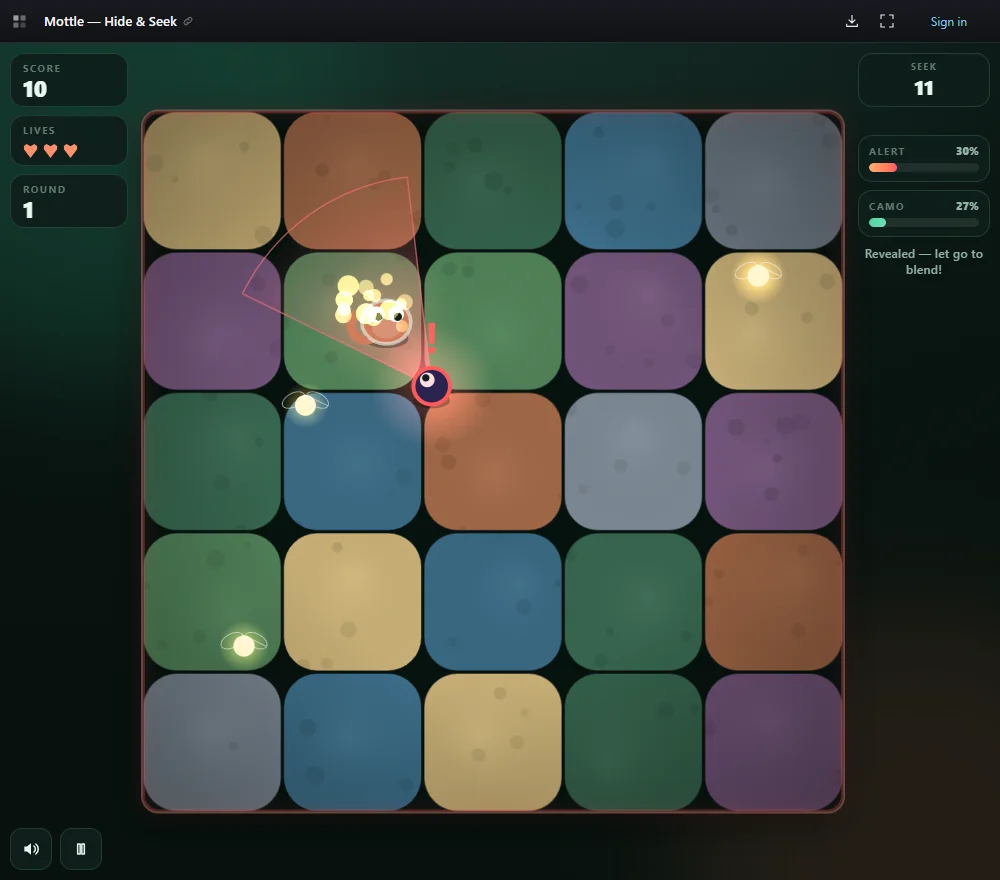
Later-round pressure was visible on screen. The captured Round 1 start shows one visible Seeker, and the Round 4 start shows three. The board colors and Firefly placement also changed. The original listing describes faster rounds. The game shows a red warning and an exclamation mark during detection. These signals help you react, while patrol timing and target selection would take separate tests to establish.
A separate Round 1 test isolated one Firefly before the end-of-round bonus. The score changed from 0 to 10 on a short drag through the glow. After release, the character started to blend. In two stationary samples about 1.3 seconds apart, Camo climbed from 60% to 100% and Alert fell from 38% to 9%. Those values describe this route under the moving beams. They are insufficient to establish a fixed recovery rate.
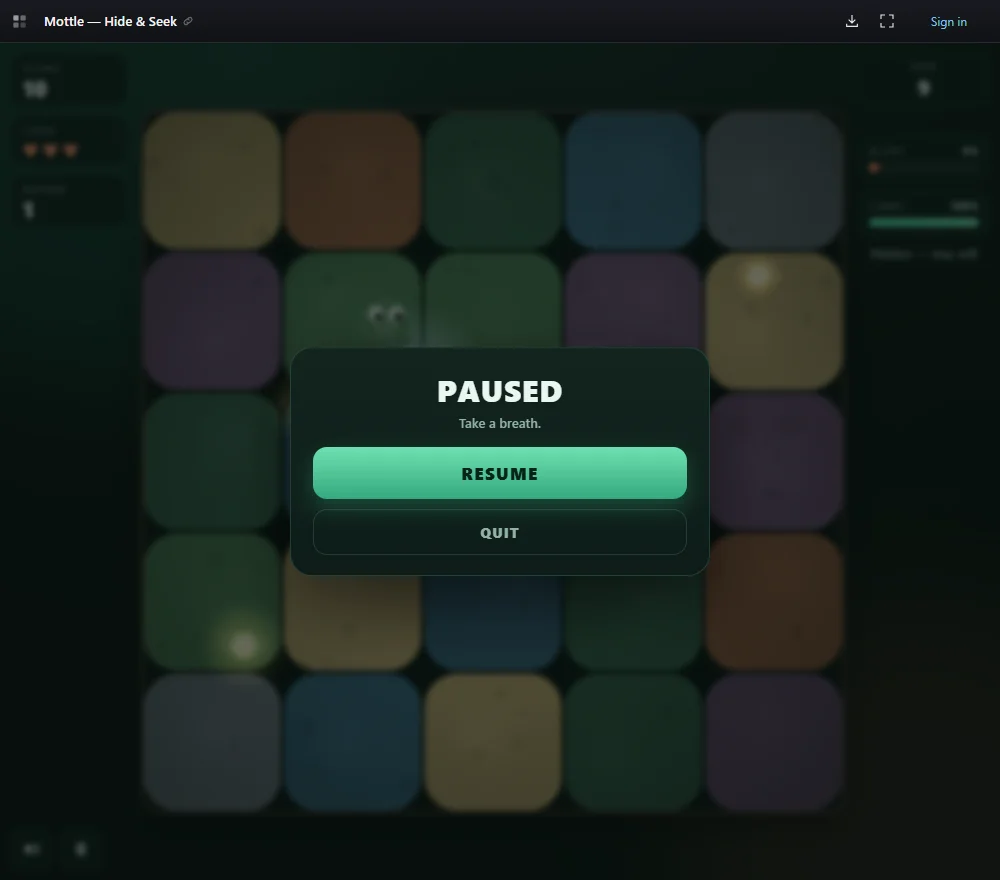
Use the on-screen Pause control if you want to stop the clock. Pressing Esc left the countdown running in our desktop test. The button opened a menu with Resume and Quit, and the visible timer stayed at 9 seconds during the pause sample.
How the game creates tension
This section is our reading of the design. A Firefly puts a reward where you have to move to collect it. Moving makes the chameleon easy to see. Releasing the same input stops movement and starts the blend. The resulting choice is simple to make and easy to get wrong when a light is turning your way.
Color, light and the meters carry different information. Color helps you read the change in the chameleon. A cone tells you where the beam points now. Alert carries the consequence of exposure long enough for you to see the danger build. That makes the game readable at a glance while still rewarding attention to timing.
The opening countdown gives you time to plan without additional controls. The escalating pace described by the creator squeezes the gap between observing and acting. A route that worked earlier may demand a shorter leg or a different place to stop later on.
High-score strategy
Build your score with pickups that leave you somewhere good to stop. You can also score by surviving a round. If a distant Firefly would keep you in the open too long, let the current search pass. Early in a run, favor the Firefly that takes a short drag and leaves you with a clear view of the next beam.
Try the sequence “look, drag, release, recheck.” Decide where to stop before you move. If the first pickup goes to plan, read the current beam again. To see whether a route improved your score, compare it with a survival run at the same round. A survival checkpoint and a final score are different measurements.
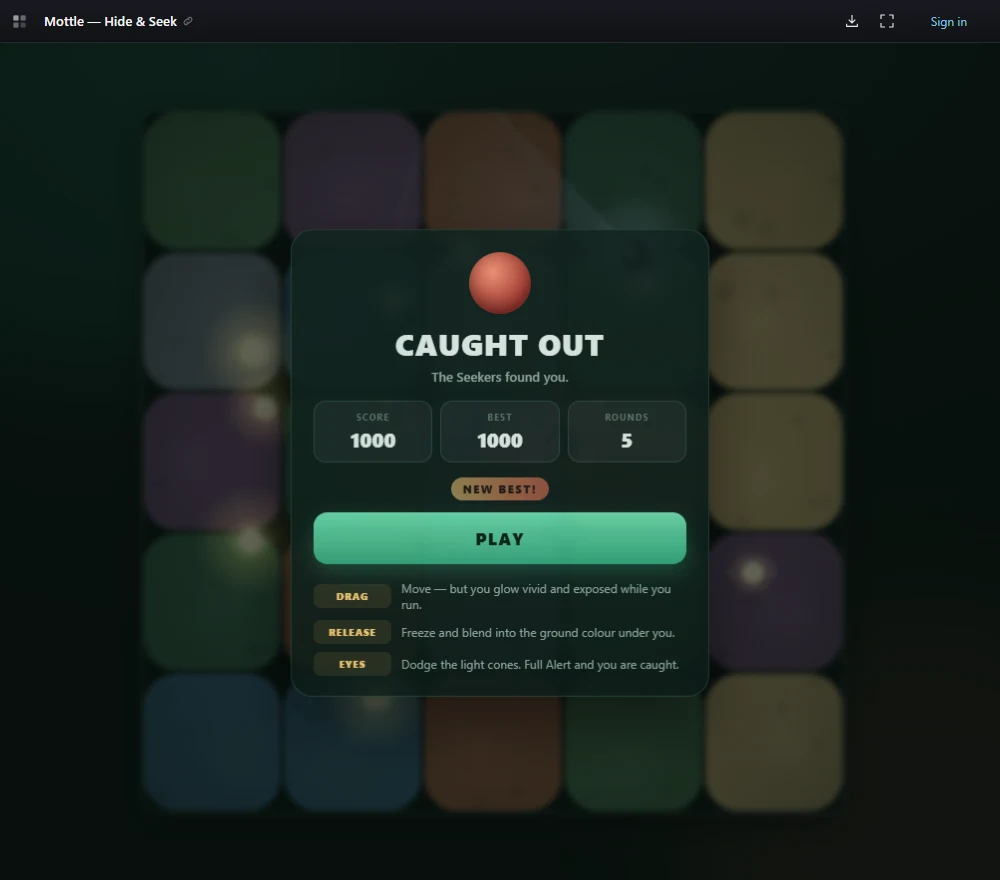
Our highest completed test score was 1,000. We stayed still through the first four rounds, and the fourth clear showed a +400 bonus with all three hearts intact. We then deliberately moved in the search lights to reach the results screen. It showed ROUNDS 5 because we reached the fifth round. The in-game BEST label records the result shown in our session. The global record and scoring ceiling remain unverified.
- Practice a short scoring route. Try one nearby Firefly followed by a deliberate stop. Judge each attempt by whether you got the pickup and had time to start blending.
- Leave a margin at the cone edge. A path that barely clears the light on a still frame may close while you drag. Cross after you see the direction of the sweep.
- Watch the second light. When two beams are near your route, track both before crossing. A gap in the first beam can line up with the second.
- Shorten the next run as pressure builds. If you keep losing a life after a pickup, try a closer stopping point in the next attempt and compare how much Alert you carry.
- Record score, round and lives. Keep the final screen. Compare similar routes across more than one run before deciding a change helped.
Getting caught and ending a run
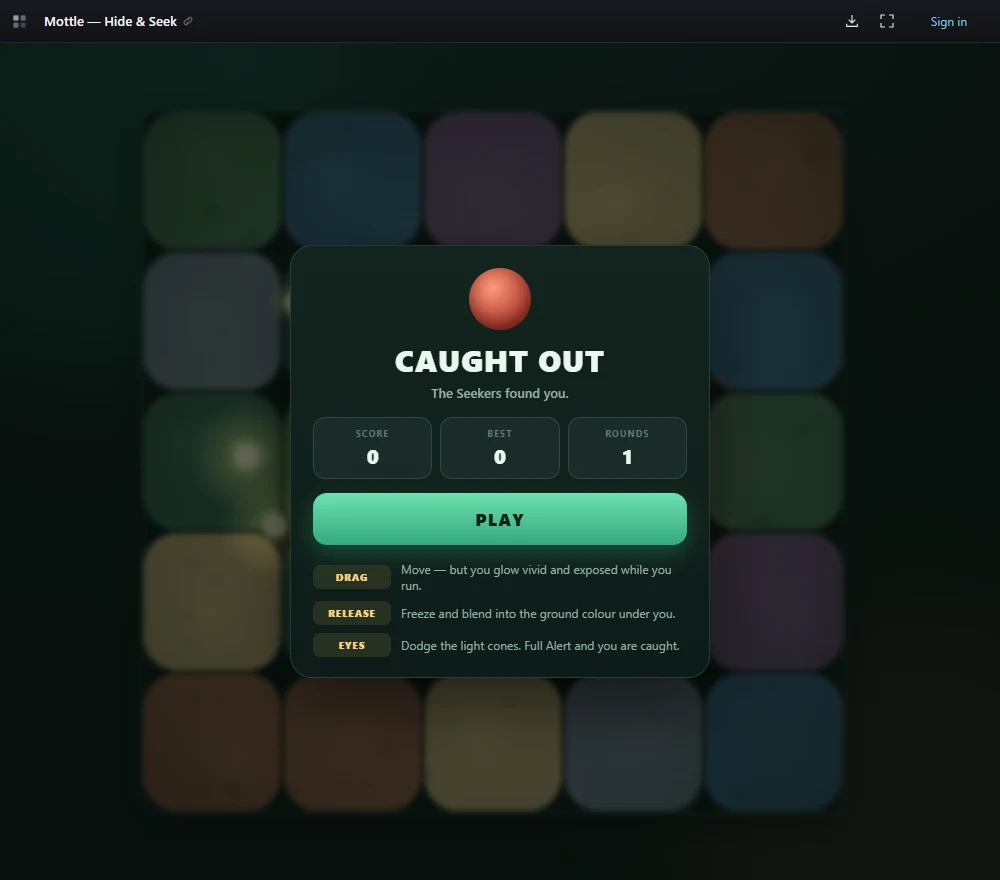
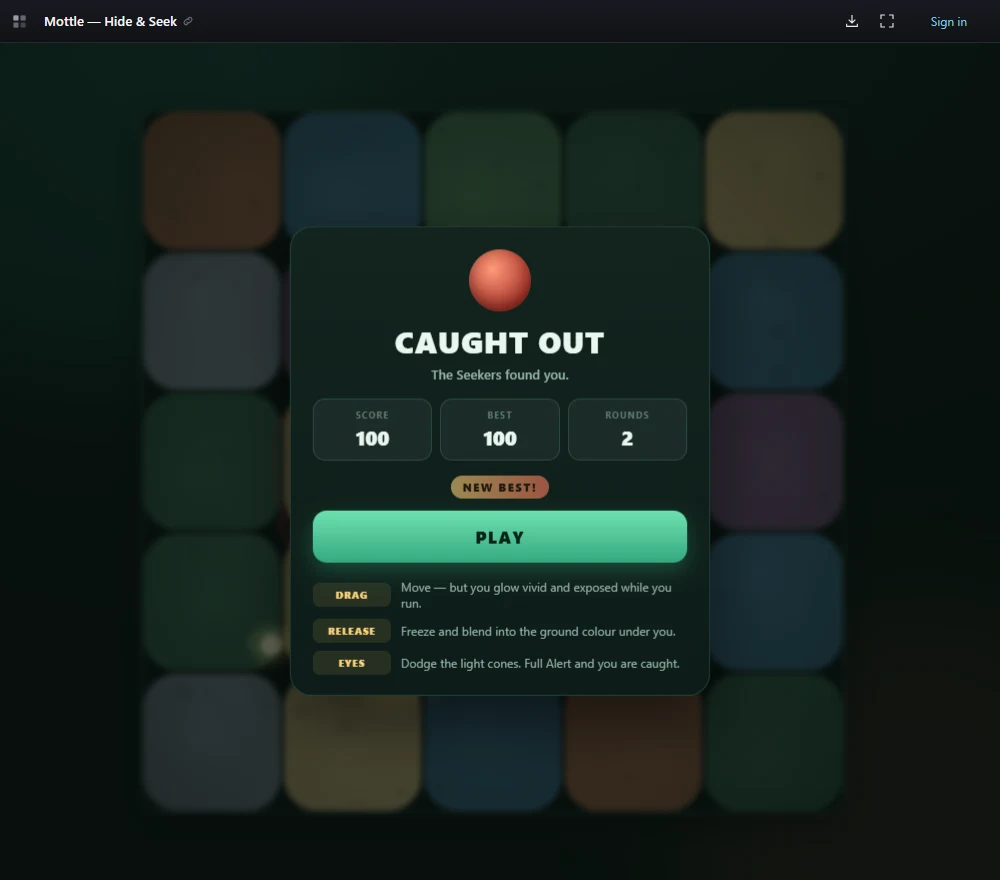
Full Alert triggers a catch and costs one life. In our failure test, the same round started again while hearts remained. The last catch opened CAUGHT OUT with a score of 0. We pressed Play from that screen and confirmed a fresh Round 1 with the Hide timer at 3 and Score 0. For your own comparisons, record the final score and the last round shown on the results screen.
For your next run, pick one change you can observe. Start the crossing later, find a closer stop, or leave a distant Firefly alone. Keep the change small enough to trace it back to the screen.
Playtest run log
| Trial | What we did | What the screen showed |
|---|---|---|
| A · Survival baseline | Stayed still after starting. No deliberate Firefly pickup. | Round 1 started at 0. Round 2 opened at 100, and Round 4 opened at 600. All three lives remained at each checkpoint. |
| B · Exposure and recovery | Dragged across the active board during Seek. | Camo fell to 0%. Alert climbed to 100% and the game deducted a life. Hide restarted in Round 1 with two lives. |
| C · Single pickup and release | Touched one glow during Round 1 Seek, then stopped. | Score 0 to 10. In two stationary samples 1.3 seconds apart, Alert fell from 38% to 9% and Camo climbed from 60% to 100%. |
| C · Pause | Pressed Esc with game focus, then used the in-game Pause button. | The game timer kept running after Esc. The Pause button showed the PAUSED menu and held the timer at 9 seconds. |
| D · All lives lost | Kept moving through search beams across several attempts in the same round. | Each catch cost a life. After the last heart, CAUGHT OUT showed SCORE 0, BEST 0 and ROUNDS 1. |
| E · Finished scoring run | Stayed still to clear Round 1, then kept moving through search beams in Round 2. | The results showed SCORE 100, BEST 100, ROUNDS 2 and NEW BEST! |
| F · Highest completed score | Stayed still for the first four rounds, then deliberately exposed the chameleon in Round 5 to get a results screen. | Round 4 showed a +400 survival bonus. The run ended at 1,000 points with BEST 1,000 and ROUNDS 5. |
Playtest screenshots